Blog Settings
Configure and Manage general aspects of your Blog. Ideally, you’ll set them up once, and won’t need to modify them recurrently, as configurations may affect other modules.
☝ Remember to Save all your changes.
Configuring the Blog Settings
Below is a detailed description of each field in the form. Required fields contain a ‘*’.

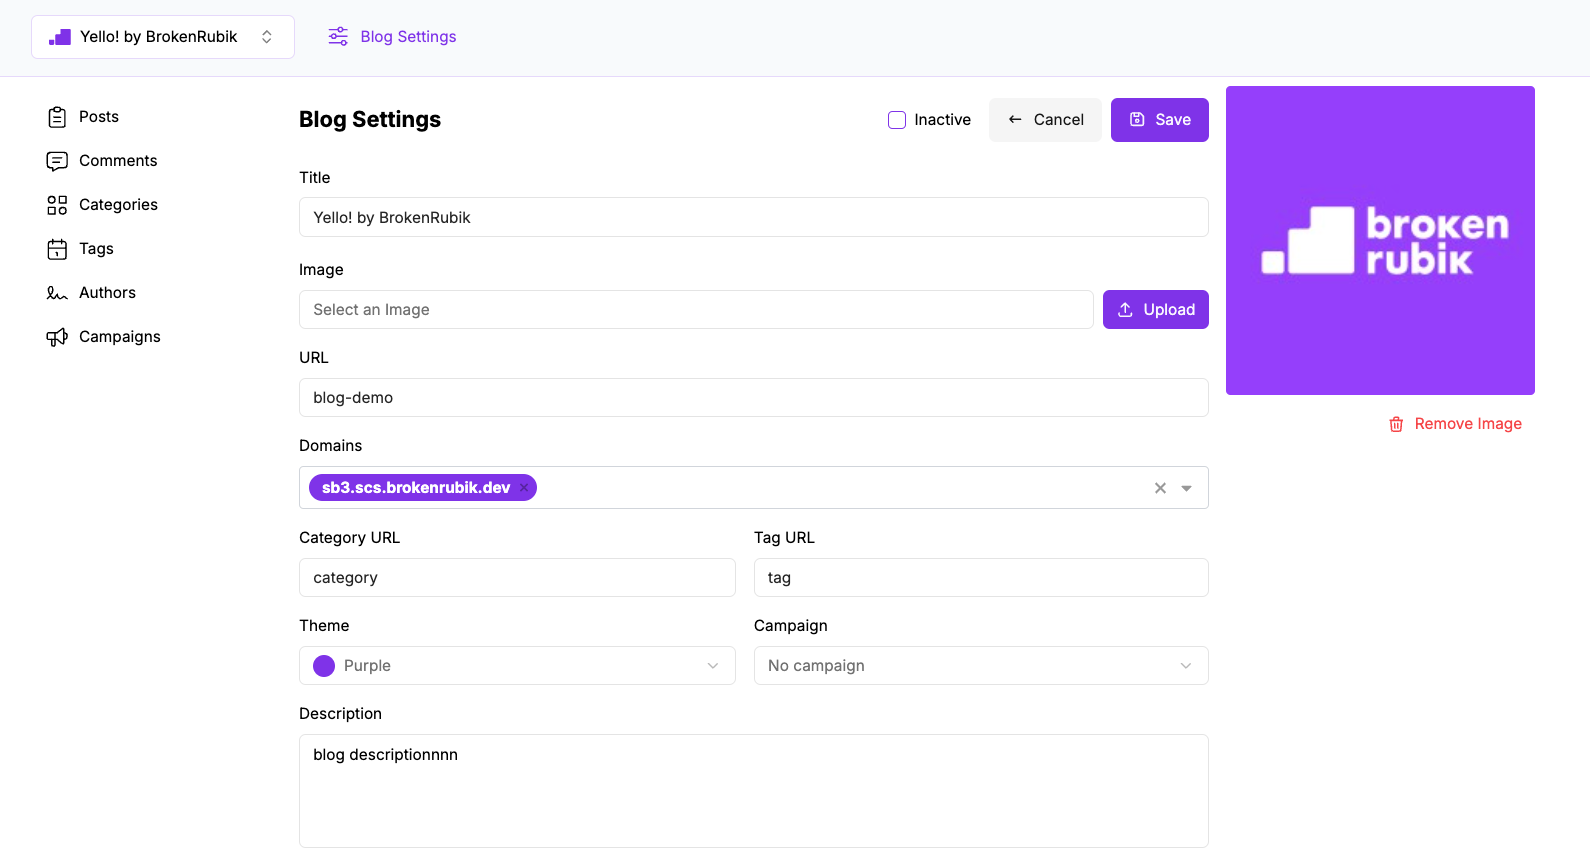
Inactive (checkbox)
When this checkbox is selected, the blog will no longer be visible on the site and is deactivated. Inactive blogs display a red icon to the right of their name in the blog selector. By default, the blog is active.
Basic Configuration
Give your blog a Name - this is the internal identifier used in system references.
Optionally provide a Title - this will be the display name shown to visitors. If no title is provided, the Name will be used.
Upload an Image, it will appear in the blog header on your website.
Specify a Path URL (path) for your blog so your potential customers can access it. Example: domain.com/blog. When defining the URL, make sure it is unique (two blogs can’t have the same URL).
Select a Domain* from the dropdown of all available domains in your account. Select a domain on which you wish the blog to appear.
Define Category URL and Tag URL paths where the post category URLs are hosted. Example: domain.com/blog-url/category-url/example-category and domain.com/blog-url/tag-url/example-tag
For instance, if your site is travel-related and you have a blog post category for tips, one category might be “Travel Tips for Families.” In this case, the URL would be: travelsite.com/blog/category/travel-tips-for-families
Choose a Theme to customize Yello! on your ERP. This value does not affect the blog’s appearance on your website; Use it to differentiate multiple blogs during configuration.
SEO Configuration
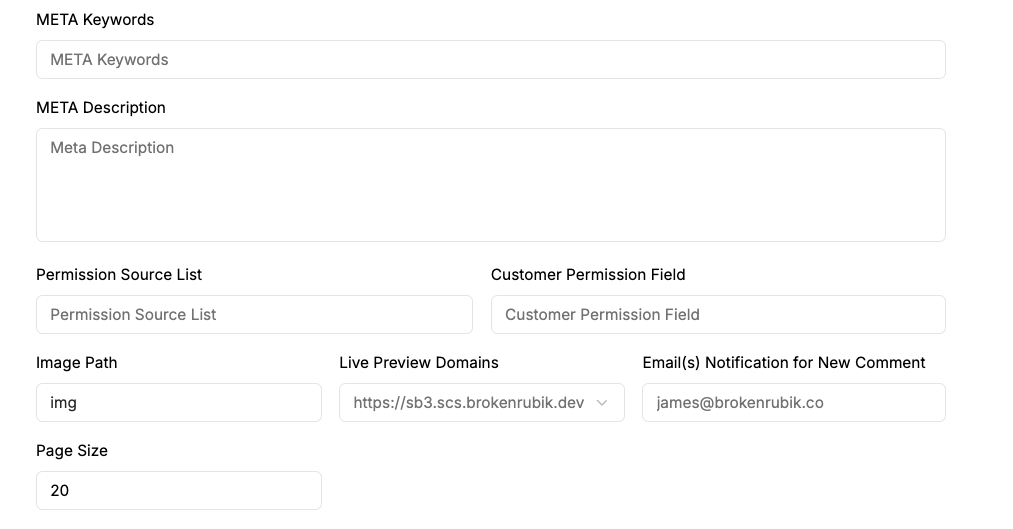
Configure Meta information to boost your SEO.

- META Keywords (input): SEO keywords that help the blog rank better in search engines. It is highly recommended to complete this field.
- META Description (input): A short SEO description of your blog; it defaults to the blog description if left blank. In any case, it is highly recommended to complete this field.
- Permission Source List (input): The ID of a list categorizing readers by access level.
- Customer Permission Field (input): The ID of a customer record field that indicates their type, linked to the defined access levels.
- Image Path (input): The base path for images, indicating where they are stored on NetSuite.
- Live Preview Domains (select): The domain entered will be where a preview of your blog will be seen
- Email(s) Notification for New Comment (input): If comments are enabled for the blog/posts, this is the email address where notifications about new comments will be received.
- Page Size (input): The number of posts to display per page. s
Other Settings

- Post Comment available (checkbox): Enables a comments section on all posts. The list of approved comments and a form for submitting new comments will be displayed. With this checkbox activated, you can customize the comments section for each post individually.
- The following checkboxes define whether certain data is displayed on each Post Page and in the list of posts, List Page. The data that can be shown or hidden includes the post author, publication date, and an “Archive” section with links to lists of posts published in previous months.
- Display Author on Post Page
- Display Date on Post Page
- Display Archive on Post Page
- Display Author on List Page
- Display Date on List Page
- Display Archive on List Page
Share on Social Media
Determine whether the icons for the following social networks are displayed in a “Share” section on each post page.